
iOS16 中的 3 种新字体宽度样式
前言
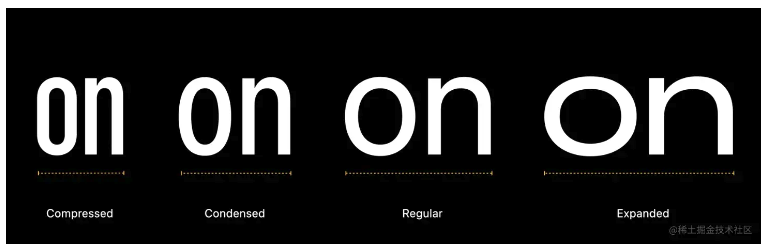
在 iOS 16 中,Apple 引入了三种新的宽度样式字体到 SF 字体库。
Compressed
Condensed
Expend

UIFont.Width
Apple 引入了新的结构体 UIFont.Width,这代表了一种新的宽度样式。
目前已有的四种样式。
standard:我们总是使用的默认宽度。
compressed:最窄的宽度样式。
condensed:介于压缩和标准之间的宽度样式。
expanded:最宽的宽度样式。
SF 字体和新的宽度样式
如何将 SF 字体和新的宽度样式一起使用
为了使用新的宽度样式,Apple 有一个新的 UIFont 的类方法来接收新的 UIFont.Width 。
class UIFont : NSObject {
    class func systemFont(
        ofSize fontSize: CGFloat,
        weight: UIFont.Weight,
        width: UIFont.Width
    ) -> UIFont
}
你可以像平常创建字体那样来使用新的方法。
let condensed = UIFont.systemFont(ofSize: 46, weight: .bold, width: .condensed)
let compressed = UIFont.systemFont(ofSize: 46, weight: .bold, width: .compressed)
let standard = UIFont.systemFont(ofSize: 46, weight: .bold, width: .standard)
let expanded = UIFont.systemFont(ofSize: 46, weight: .bold, width: .expanded)
SwiftUI
更新:在 Xcode 14.1 中,SwiftUI 提供了两个新的 API 设置这种新的宽度样式。
width(_:)和fontWidth(_:)。
目前(Xcode 16 beta 6),这种新的宽度样式和初始值设定只能在 UIKit 中使用,幸运的是,我们可以在 SwiftUI 中轻松的使用它。
有很多种方法可以将 UIKit 集成到 SwiftUI 。我将会展示在 SwiftUI 中使用新宽度样式的两种方法。
- 将 UIfont 转为 Font。
- 创建 Font 扩展。
将 UIfont 转为 Font
我们从 在 SwiftUI 中如何将 UIFont 转换为 Font 中了解到,Font 有初始化方法可以接收 UIFont 作为参数。
步骤如下
- 你需要创建一个带有新宽度样式的 UIFont。
- 使用该 UIFont 创建一个 Font 。
- 然后像普通 Font 一样使用它们。
struct NewFontExample: View {
    // 1
    let condensed = UIFont.systemFont(ofSize: 46, weight: .bold, width: .condensed)
    let compressed = UIFont.systemFont(ofSize: 46, weight: .bold, width: .compressed)
    let standard = UIFont.systemFont(ofSize: 46, weight: .bold, width: .standard)
    let expanded = UIFont.systemFont(ofSize: 46, weight: .bold, width: .expanded)

    var body: some View {
        VStack {
            // 2
            Text("Compressed")
                .font(Font(compressed))
            Text("Condensed")
                .font(Font(condensed))
            Text("Standard")
                .font(Font(standard))
            Text("Expanded")
                .font(Font(expanded))
        }
    }
}- 创建带有新宽度样式的 UIFont。
- 用 UIFont 初始化 Font, 然后传递给 .font 修改。
创建一个 Font 扩展
这种方法实际上和将 UIfont 转为 Font 是同一种方法。我们只需要创建一个新的 Font 扩展在 SwiftUI 中使用起来更容易一些。
extension Font {
    public static func system(
        size: CGFloat,
        weight: UIFont.Weight,
        width: UIFont.Width) -> Font
    {
        // 1
        return Font(
            UIFont.systemFont(
                ofSize: size,
                weight: weight,
                width: width)
        )
    }
}
创建一个静态函数传递 UIFont 需要的参数。然后,初始化 UIFont 和创建 Font 。
我们就可以像这样使用了。
Text("Compressed")
    .font(.system(size: 46, weight: .bold, width: .compressed))
Text("Condensed")
    .font(.system(size: 46, weight: .bold, width: .condensed))
Text("Standard")
    .font(.system(size: 46, weight: .bold, width: .standard))
Text("Expanded")
    .font(.system(size: 46, weight: .bold, width: .expanded))
如何使用新的宽度样式
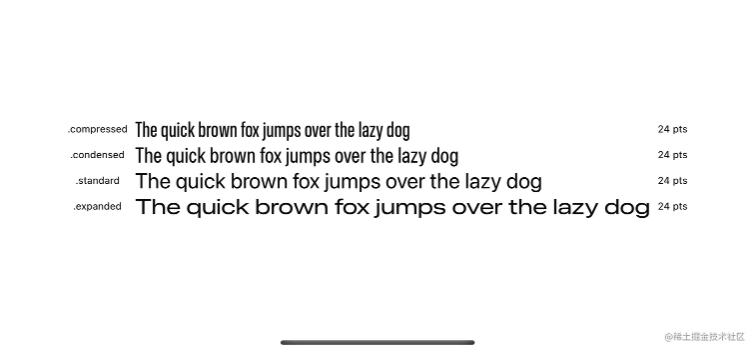
你可以在你想使用的任何地方使用。不会有任何限制,所有的新宽度都有一样的尺寸,同样的高度,只会有宽度的变化。
这里是拥有同样文本,同样字体大小和同样字体样式的不同字体宽度样式展示。
新的宽度样式优点
你可以使用新的宽度样式在已经存在的字体样式上,比如 thin 或者 bold ,在你的 app 上创造出独一无二的体验。
Apple 将它使用在他们的照片app ,在 "回忆'' 功能中,通过组合不同的字体宽度和样式在标题或者子标题上。

这里有一些不同宽度和样式的字体组合,希望可以激发你的灵感。
Text("Pet Friends")
    .font(Font(UIFont.systemFont(ofSize: 46, weight: .light, width: .expanded)))
Text("OVER THE YEARS")
    .font(Font(UIFont.systemFont(ofSize: 30, weight: .thin, width: .compressed)))

Text("Pet Friends")
    .font(Font(UIFont.systemFont(ofSize: 46, weight: .black, width: .condensed)))
Text("OVER THE YEARS")
    .font(Font(UIFont.systemFont(ofSize: 20, weight: .light, width: .expanded)))

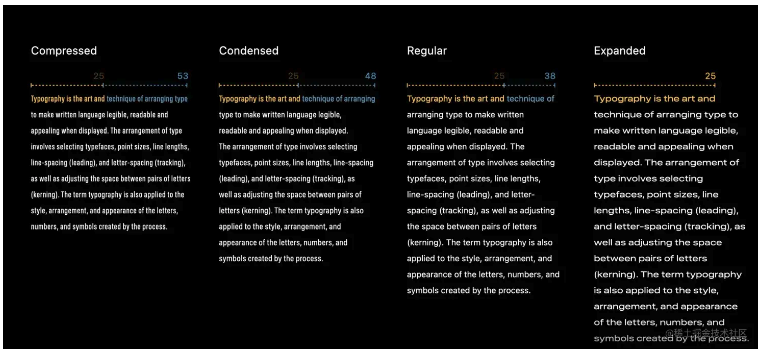
你也可以用新的宽度样式来控制文本的可读性。
下面的这个例子,说明不同宽度样式如何影响每行的字符数和段落长度
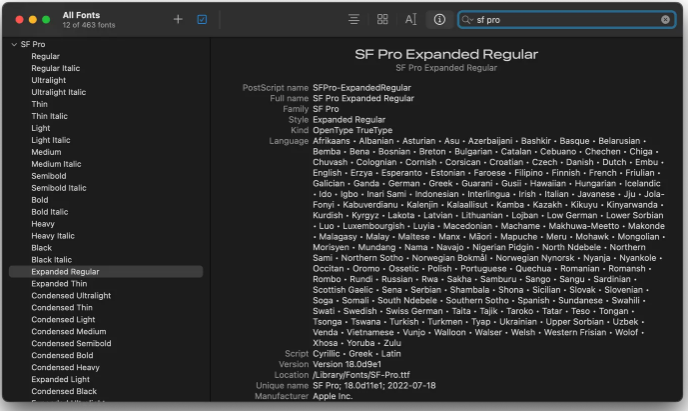
下载这种字体
你可以在 Apple 字体平台 来下载这种新的字体宽度样式。
下载安装后,你将会发现一种结合了现有宽度和新宽度样式的新样式。
基本上,除了在模拟器的模拟系统 UI 中,在任何地方都被禁止使用 SF 字体。请确保你在使用前阅读并理解许可证。
链接:https://juejin.cn/post/7158003140258709518
来源:稀土掘金
著作权归作者所有。商业转载请联系作者获得授权,非商业转载请注明出处。
