
Android实战-Native层thread的实现方案
最近阅读Android源码,很多地方都涉及到了线程的概念,比如BootAnimation,应用层的线程倒是略懂一二,Framework的线程却是知之甚少,因此特此记录如下:
Android的Native层thread的实现方案一般有两种:
- Linux上的posix线程方案
- Native层面封装的Thread类(用的最多)
posix线程方案
首先创建空文件夹项目-Linux_Thread
其次在Linux_Thread文件夹下创建一个文件thread_posix.c:主要逻辑是在主线程中创建一个子线程mythread,主线程等待子线程执行完毕后,退出进程:
#include <pthread.h>
#include <stdio.h>
#include <stdlib.h>
#include <utils/Log.h>

//线程执行逻辑
void *thread_posix_function(void *arg)
{

	(void*) arg;
int i;
for(i = 0; i < 40; i++)

	{
printf("hello thread i + %d\n", i);
ALOGD("hello thread i + %d\n", i);
sleep(1);

	}
return NULL;

}

int main(void)
{

pthread_t mythread;
//创建线程并执行
if(pthread_create(&mythread, NULL, thread_posix_function, NULL))

	{
ALOGD("error createing thread");
abort();

	}

sleep(1);
//等待mythread线程执行结束
if(pthread_join(mythread, NULL))

	{
ALOGD("error joining thread");
abort();

	}
ALOGD("hello thread has run end exit\n");
//退出
exit(0);

}
然后在Linux_Thread文件夹下创建项目构建文件Android.mk中将文件编译为可执行文件:
LOCAL_PATH:=${call my-dir}
include ${CLEAR_VARS}

LOCAL_MODULE := linux_thread

LOCAL_SHARED_LIBRARIES := liblog

LOCAL_SRC_FILES := thread_posix.c

LOCAL_PRELINK_MODULE := false
include ${BUILD_EXECUTABLE}
最后确认Linux_Thread项目位于aosp源码文件夹内,开始编译Linux_Thread项目:
source build/envsetup.sh

lunch

make linux_thread
执行成功后,找到输出的可执行文件linux_thread,将文件push到Android设备中去:
adb push linux_thread /data/local/tmp/
注意如果出现报错 Permission denied,需要对文件进行权限修改:
chmod -R 777 linux_thread
开始启动linux_thread:
./linux_thread
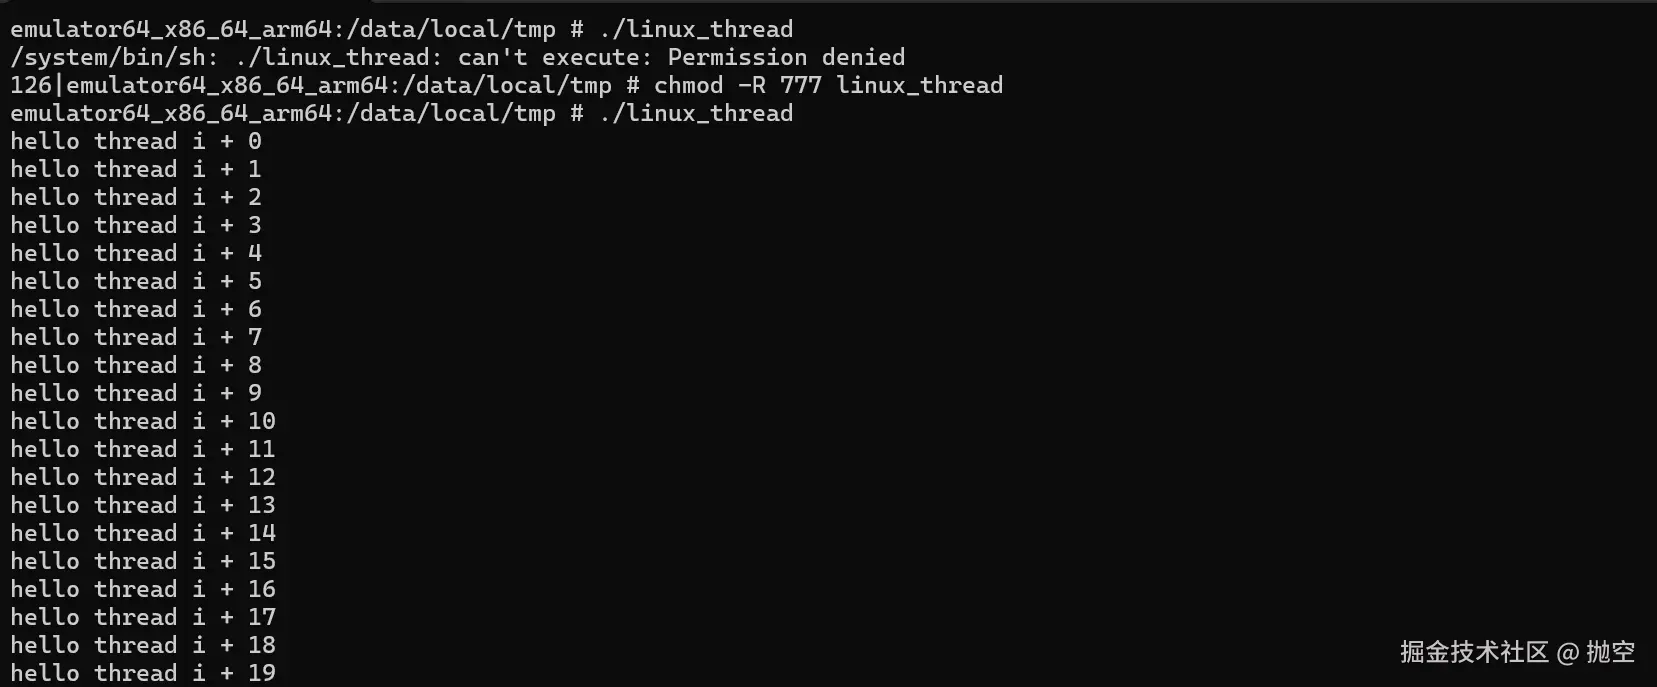
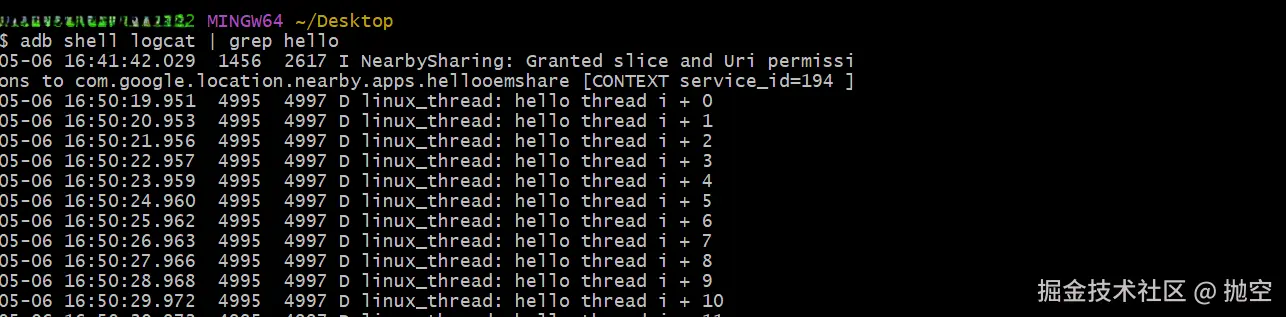
同时也可以通过日志打印输出:
adb shell locat | grep hello
以上就是posix线程方案的实现。
Native层的Thread类方案
源码分析
Native层即Framework层的C++部分,Thread的相关代码位置
头文件:
system/core/libutils/include/utils/Thread.h源文件:
system/core/libutils/Threads.cpp
# system/core/libutils/include/utils/Thread.h
class Thread : virtual public RefBase

{
public:
explicit            Thread(bool canCallJava = true);
virtual             ~Thread();

virtual status_t    run(    const char* name,
int32_t priority = PRIORITY_DEFAULT,
size_t stack = 0);

virtual void        requestExit();

virtual status_t    readyToRun();

status_t    requestExitAndWait();

status_t    join();

bool        isRunning() const;


    ...

}
Thread继承于RefBase,在构造函数中对canCallJava变量默认赋值为ture,同时声明了一些方法,这些方法都在源文件中实现。
status_t Thread::run(const char* name, int32_t priority, size_t stack)
{

    ...
if (mRunning) {
// thread already started
return INVALID_OPERATION;

    }

    ...

    mRunning = true;

bool res;
if (mCanCallJava) {

        res = createThreadEtc(_threadLoop,
this, name, priority, stack, &mThread);

    } else {

        res = androidCreateRawThreadEtc(_threadLoop,
this, name, priority, stack, &mThread);

    }

if (res == false) {

        mStatus = UNKNOWN_ERROR;   // something happened!

        mRunning = false;

        mThread = thread_id_t(-1);

        mHoldSelf.clear();  // "this" may have gone away after this.

return UNKNOWN_ERROR;

    }
return OK;

// Exiting scope of mLock is a memory barrier and allows new thread to run

}

int androidCreateRawThreadEtc(android_thread_func_t entryFunction,
void *userData,
const char* threadName __android_unused,
int32_t threadPriority,
size_t threadStackSize,
android_thread_id_t *threadId)
{

    ...

    errno = 0;
pthread_t thread;
int result = pthread_create(&thread, &attr,

                    (android_pthread_entry)entryFunction, userData);
pthread_attr_destroy(&attr);
if (result != 0) {
ALOGE("androidCreateRawThreadEtc failed (entry=%p, res=%d, %s)\n"
"(android threadPriority=%d)",

            entryFunction, result, strerror(errno), threadPriority);
return 0;

    }

    ...
return 1;

}

int Thread::_threadLoop(void* user)

{

    ...
bool first = true;

do {
bool result;
//是否第一次执行
if (first) {

            first = false;

            self->mStatus = self->readyToRun();

            result = (self->mStatus == OK);

if (result && !self->exitPending()) {

                result = self->threadLoop();

            }

        } else {

            result = self->threadLoop();

        }

// establish a scope for mLock

        {

        Mutex::Autolock _l(self->mLock);
//根据结果来跳出循环
if (result == false || self->mExitPending) {

            self->mExitPending = true;

            self->mRunning = false;

            self->mThread = thread_id_t(-1);

            self->mThreadExitedCondition.broadcast();
break;

            }

        }

        strong.clear();

        strong = weak.promote();

    } while(strong != nullptr);

return 0;

}
在run方法中,mCanCallJava变量一般为false,是在thread创建的时候赋值的。从而进入androidCreateRawThreadEtc()方法创建线程,在此函数中,可以看见还是通过pthread_create()方法创建Linux的posix线程(可以理解为Native的Thread就是对posiz的一个封装);线程运行时回调的函数参数entryFunction值为_threadLoop函数,因此创建的线程会回调到_threadLoop函数中去;_threadLoop函数里则是一个循环逻辑,线程第一次魂环会调用readyToRun()函数,然后再调用threadLoop函数执行线程逻辑,后面就会根据threadLoop执行的结果来判断是否再继续执行下去。
代码练习
头文件MyThread.h
#ifndef _MYTHREAD_H
#define _MYTHREAD_H

#include <utils/threads.h>

namespace android

{
class MyThread: public Thread

    {
public:
MyThread();
//创建线程对象就会被调用
virtual void onFirstRef();
//线程创建第一次运行时会被调用
virtual status_t readyToRun();
//根据返回值是否继续执行
virtual bool threadLoop();
virtual void requestExit();

private:
int hasRunCount = 0;

    };

}
#endif
源文件MyThread.cpp
#define LOG_TAG "MyThread"

#include <utils/Log.h>
#include "MyThread.h"

namespace android

{
//通过构造函数对mCanCallJava赋值为false

    MyThread::MyThread(): Thread(false)

    {
ALOGD("MyThread");

    }

bool MyThread::threadLoop()
{
ALOGD("threadLoop hasRunCount = %d", hasRunCount);

        hasRunCount++;
//计算10次后返回false,表示逻辑结束,线程不需要再继续执行咯
if(hasRunCount == 10)

        {
return false;

        }
return true;

    }

void MyThread::onFirstRef()
{
ALOGD("onFirstRef");

    }

status_t MyThread::readyToRun()
{
ALOGD("readyToRun");
return 0;

    }

void MyThread::requestExit()
{
ALOGD("requestExit");

    }

}
程序入口Main.cpp
#define LOG_TAG "Main"

#include <utils/Log.h>
#include <utils/threads.h>
#include "MyThread.h"

using namespace android;

int main()
{


    sp<MyThread> thread = new MyThread;

    thread->run("MyThread", PRIORITY_URGENT_DISPLAY);
while(1)

    {
if(!thread->isRunning())

        {
ALOGD("main thread -> isRunning == false");
break;

        }

    }

ALOGD("main end");
return 0;

}
项目构建文件Android.mk
LOCAL_PATH:=${call my-dir}
include ${CLEAR_VARS}

LOCAL_MODULE := android_thread

LOCAL_SHARED_LIBRARIES := libandroid_runtime \

				libcutils \

				libutils \

				liblog

LOCAL_SRC_FILES := MyThread.cpp \

				Main.cpp \


LOCAL_PRELINK_MODULE := false
include ${BUILD_EXECUTABLE}
项目目录如下:
通过命令带包得到android_thread可执行文件放入模拟器运行:
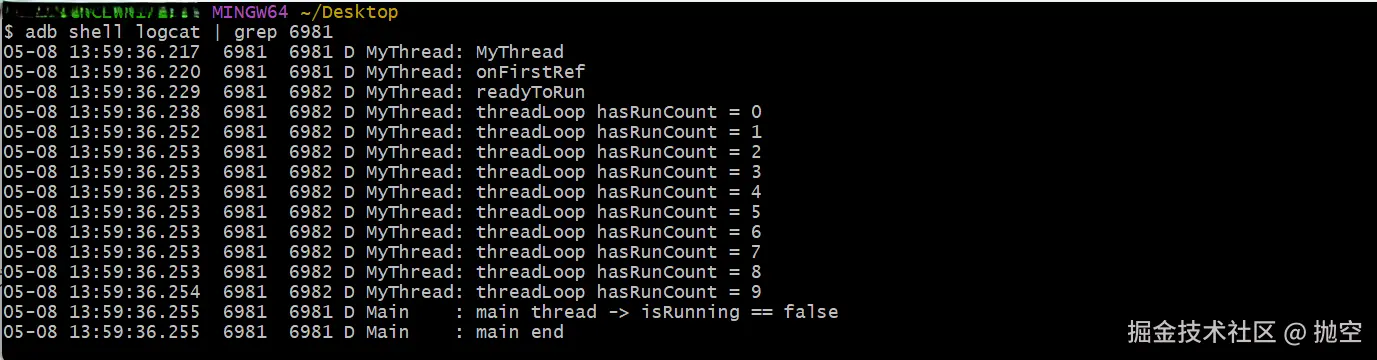
来源:juejin.cn/post/7501624826286669859
